
Workshop Experience : Photography Studies College Week #12 and #13

Combined two weeks in review this time as one stream finishes (Composition) and the other stream steps up gear with City Scapes and idea generation for our Personal Expression component of our portfolio.
Combined write ups this week due to a bit of a backlog and also one of our major streams - Composition, Form and Perspective - has finished up for the term.
For our final composition category session we looked at Space and The Picture Plane. This is where we get in to compositional aspects such as scale, perspectives, forced perspectives, birds eye views, worms eye views, geometric perspectives, etc.
Really interesting and well known images use this element effectively, including works by Josef Koudelka, Amani, Willett, and Alex McLean.
We also noted that tonal contrast is used extensively here, with high contrast advancing, lower contrasts receeding. Placement of subjects is also key to this compositional category as Koudelka uses to great effect.

© Josef Koudelka
This wrapped up our stream around Composition, and all we had to do now was submit our 3 images by 7 categories written submission - using all our own images ! Will share and update results next time.
On to our other stream and Week 12 was all about City scapes. We basically went straight out to shoot and had a quick 3 image assignment to create - one people image, one city scape, and one interpretative city scape image. Below are my submissions (all shot using Canon 6D, 16-35mm lens, ISO100 and appropriate shutter speeds for the effect - fast and slow.


Focus was on capturing interesting fore, middle and back grounds, as well as appropriate exposure and lighting. The people capture was to show low light crisp people shots, and I exposed for the bright tops the subjects were wearing throwing the rest in to shadow.
The golden bridge image was in a natural light window of about 3 minutes, and I loved the colour that hit the bridge, as well as the sky directly above, and then repeated on the top of the buildings.
Week 13 we focused on our Personal Expression aspect of our portfolios. and we also received marks and feedback from our earlier two assignments.
To help us along our path on the personal expression series for our portfolio, we looked at some great series of work by Teun Hocks, Izima Kaoru and Gregory Crewdson. Amazing stuff and do check them out if you can. Karol's series in particular struck me - he asked models to choose designer clothes that they would like to die in, then asked them to describe the manner in which they think they will die, and he went out and shot them in that scenario.
Our tutor Scott urged us to do a series on what we are passionate about, and not worry too much about acing the portfolio or that our ideas are boring. As he rightly reminded us, no one sees the world like we do so capture it and then it will be fresh and new to others. Easier said than done ! I have a few ideas for my personal expression section but yet to solidify and start the process. Must get a move on !
Until next week !

Book Review : Leica S Magazine Issue #7

A review of the latest Leica S Magazine and the series by Magnum photographer Bruce Gilden.
This is a quick commentary on the latest edition of the Leica S magazine. I dont own a Leica S series camera, but the lovely Leica people let you buy their magazine anyways (-: I subscribe to the Leica Fotografie International magazine though and thats a cracker. Only issue is the germans are not very enviro friendly - every edition comes vacuum wrapped in cling wrap, and sealed in a very thick cardboard post pack - yes it arrives in pristine condition, but how many hydrocarbons were emitted in the process?? I still buy it though ....
Anyways, on to the Leica S magazine. This edition I had to buy as it features entirely recent works by Bruce Gilden. A "polarising" figure manyy say, but his approach to photography and his output are truly amazing, if not a little front foot and provocative. But hey, the world needs it.

For those that follow Magnum of Instagram, they have been "Gilden bombing" their account the past two weeks and getting plenty of likes and comments - worth reading through the diverse opinions, grouped very easily in to "Fantastic" and "Exploitative".
The series is called "American Made" and I am glad I bought the magazine because at least you get some context from Bruce himself (in an interview with his wife) about where these ideas came from, the process that was used to meet and capture the frames, and why.
Gilden purposely hangs outs at American fairs, as he thinks the sort of people that generally go to these town events have "visually interesting" faces and compositions. Golden also always hangs out at the lower socio economic sides of town, preferring to capture prostitutes and drug addicts and the socially challenged. And of course being a Magnum recognised photographer, he always does it technically brilliantly, with amazing use of natural and fill light and in this series in particular, absolutely pin sharp frame filling portraits. (its a bit of an ad for the Leica S as they made him switch from his standard M240 to a S to give it a go ...)
This latest series covers people at fairs, people from "The Bottoms" ( a low socio-economic suburb of Columbus, Ohio), farm boys and girls, and amazingly food - well, its called that, but its self made studio style shots of the weird and wonderful pieces of food people were eaten at the fairs he visited.
The images are confronting. Not all but some are clearly of people struggling wth mental health issues, drug issues, or other types of pain. The eyes on every single shot are the immediate draw point, and then you scan around the filled frame looking at the other facial aspects, then finally a complete sense of the face - the person. I feel on the verge of voyeurism and exploitation when looking at the images, yet Gilden has clearly established a link with these people in order to capture them so close and so deliberately, so they know what the are doing.

Image © Bruce Gilden
The food series is also amazing. Golden simply used a white piece of paper out at the fairs he visited to backdrop the non descriptor food people were eating. A grotesque and intriguing series being the result, and cures any hunger pains the reader may have in an instance.
I like Gildens work generally and marvel at his front foot and in your face style to capture a frame. I believe him when he says he is capturing real people and their real projections. And i also believe his subjects are willing participants and hence dot quite buy in to the exploitation line of analysis.
The magazine price is well worth it for an entry ticket in to Gildens new colourful, frame filling view of American life.

Workshop Experience : Photography Studies College Week #11

Week 11 and the portfolio submission time is looming ! This week was some more time refining workflow via LR and on the composition side, it was all about Rhythm and Movement - and some dancing to Bolero !
Week 11 Wednesday saw a more in-depth session in the digital lab around catalogs and presenting work externally for commercial use. Lightroom makes all of this very very easy of course.
I have recently changed my workflow and now use LR CC in unison with Phase Ones' Media Pro catalog software.


So now I import through LR (hate the new update and import sequence - luckily you can go in to preferences and get rid of it.
Much babble online about how many people are hating the latest Adobe update ...). Where was I. Do your importing into LR, do your Develop needs, then I do three things differently now:
1. With all the import images that I have edited and made as I need them, I export these as hi res JPEGS in to Media Pro in the same folder name (but diff location) as the LR folder name.
2. I then export the entire LR folder as a catalog to an eternal storage device for a full back up copy if you like of that folder in catalog format (previews, RAW, etc)
3. I then remove the folder from LR. So if I am up to date, my LR folder structure is completely empty as I have converted all the images I want to keep as hi res JPEgs and I have saved all images per folder as a catalog. All done and nice and clean. And of course LR just hums with all my develop wrk as it isn't trying to sort and keep large folder structures of images.
That way i have an additional copy of all the images I have taken, and then in Media Pro i just have a folder structure of all hi res JPEGs that I can sort through very easily (much easier than LR as LR is not a catalog piece of software) and I can create photoessays, catalogs, JPEG's i like then export them to wherever I need them to go. It works really well.
Whilst Media Pro is a little clunky for me ( I am still getting used to it) whats great is that you can create as many "catalog sets" as you like for any particular project your re working on (e.g. Landscape Series or Job for Newspaper or Mum's 70th) and you simply drag the thumbnail from the Media Pro preview of your catalog, and a copy and reference to said image is now placed under the catalog name. So you can build up these catalog sets as you go, then wen it comes to decide and finish, you simply go through these thumbs and select which ones you want to include, package them up, and either print them, or export them or do whatever you need to do with them. A great way to continually sort through your images and select the best ones suited for the job at hand, Really very efficient and good. Must thank Thorsten von Overgaard for his direction on this one !

On Thursday with Lucia we jumped into our second last composition category, that of Rhythm and Movement.
To get us in to the vibe we watched an awesome interpretative dance video to the sounds of Bolero - quiet amazing.
This category is all about Pattern, Rhythm, Resonance, Line, Movement - slightly repetitive elements that direct the eye through the frame.
Shape, position, size, density, direction, colour and interval are all tools that are used to achieve this composition type - very much what any book on Gestalt Theory gets stuck well in to.
We looked at works from Martha Rosler, Brook Andrew, Jeff Wall and others.
A fairly difficult aspect of composition as the key is to get the arrangement such that it leads the eye through the frame strongly. Practise here we come !


Image 1 : Aerial using DJI P3, Image 2 : Canon 6d 50mm, Image 3 : Leica M240 50mm

Book Review : David Duchemin and Bryan Peterson

A revised edition of the great toolbox/assignment based book by the easy writing David Duchemin. Well worth the pickup. And a revised edition of one-of-the-many Bryan Peterson classics.
Been buying quite a few books lately and trying to plough through hem whilst doing my course, as well as all the other things that go on day to day ...

Bryan Peterson is a bit of a legend when it comes to explanatory books, his chestnut being "Understanding Exposure" - a must buy and consume. Learning to See Creatively takes us through a very well imaged and glossy journey of how to see in colours, design and composition. Bryan tells it like it is and always leaves the reader and photographer wanting to try out the techniques and ideas he shares. His supporting frames are fantastic, and are all noted with exposure settings and supporting gear (tripod, cable release, etc). Really helpful.
The sections are well set out according to the fundamental Elements of Design and take you through many practical ideas and tools to use when out in the field. Its a detailed insight into the creative side of photography and frame capturing and I like his style.
David Duchemin is an extensive photographer and writer, and his Visual Toolbox has been revised the year to now have 60 Lessons !

This book is a great read and well designed with large format page and glossy, thick pages. David takes us through several areas of theory, practise and creativity to cover a wide range of fundamental and exploratory topic areas, accompanying just about every section with a practical and/or creative assignment.
He writes as if he is sitting opposite you having a chat with a couple of cameras on the table in the middle. Its great. And make sit so easy to consume such topic areas as the Zone System, Seeing Light and all the Composition areas.
This book in particular goes in to some very useful areas but sometimes they seem a little brief for me - not enough insight in to how to capture the topic area at hand, or some of the basics that are needed in order to capture the scene as being described. That said, it's an easy read and if you did every assignment as described, improvement would be assured. Its topic areas match the course I am doing well so i have used it as a complimentary tool box literally.
And as you lust after that new piece of glass, or that new latest format camera, remember to try and buy books not gear !

Workshop Experience : Photography Studies College Week #10

A great week exploring Light and Tone. Really these are the only things that matter in photography, and then its all about the tools and manner in which you capture them to tell a story or to engage. A great week of theory and practise.
Well the four assignments we had due are all loaded up and done, so a collective sigh of relief went through the class this week. Great to get to a sense of achievement although we are yet to get the feedback and critique ! And actually thats what the best parts of the semester have been - when either the tutor or fellow class mates give direct and improvement feedback on an image. Its hard to hear sometimes but it teaches us the art of self critique, filtering of images, and detachment to the image. After all, its more about the emotion and story we evoke in others after it has evoked emotion in us that makes a frame standout.

© Simon Schluter
Light, light, light. This week Scott took us through the one and only aspect of photography that we are all endeavouring to capture in a compelling and emotive way - light. Thats all there is to it - let it hit your sensor in the way that you want it to, press the shutter release, and seal the frame in to memory. Easy - not!
As they say (well Vernon Trent said and many repeat) :
“Amateurs worry about the gear, Professionals worry about the money, and Masters worry about the light””
Scott being the lead Fairfax photographer and magazine front cover image maker knows only to well about the creative use of light. He is amazing at problem solving out on the street and positioning the subject, or moving to get the right light, to ensure an emotive frame.
Scott let us know that in his opinion, there should only ever be one main right source - sun or otherwise - and that other light sources (flash, set lights, etc) should only be Haddon and supportive to the main source. So if you are outside at daytime, the sun is your main, and any use of flash or other lights should only compliment and Haddon to the main source; not try and over power it.
We discussed how to identify hard and soft light (look for the shadows - well defined = hard, furry = soft); Direction and Quantity of light (Front (subject pops), Side (lecture pops), Backlit (seperation achieved), Top and Bottom.
The closer you are to the source the more dramatic, harsher the subject will appear; further away and you get a more even light fill.
Sources are important - the smaller they are, the higher contrast and harder the light will be; the larger the source, the softer contrast you will see, and much softer lighting overall.
We then discussed the link between exposure control and light of course and how generally you under expose fro creativity. That said, have look through any Trent Parke portfolio and you will see his amazing over exposure skills at play. What a master.
And not a digital meter in sight !
Its all about problem solving and waiting for the right subject to enter the light and for you to control the camera to give the frame that you have imagined. And a small few people are very damn good at it indeed and offer constant inspiration and challenge.

Leica M6 frame and light meter triangles
I picked up a film Leica M6 camera way before I should of and started taking images. Self taught mostly through reading and using, I for the life of me really struggled getting the types of exposure I thought I was seeing. Every trip to the film develop lab was filled with anticipation, but I could tell on the business owners face when I picked up the negatives that they were "supportive" in my endeavours ! And when you only have a red triangle and a dot to meter, well i now know I was well out of my depth - and my images showed it ! Still, it was and is a great way to learn how to set the exposures you want to capture the particular mood you are after for a scene.
In the digital world, we have so much information available to us through the viewfinder and or back screen, and some of it is actually useful and critical !

Typical DSLR meter view
Owning a Leica I was well used to manual settings - there isn't anything else on the good models ! But with modern DSLR's its easy to get lazy, its easy to get confused by the technology, and forget what is actually important information that can really help you capture what it is you want to. But despite whatever camera you use, film or digital, cheap or expensive, it is only as good as what you tell it to capture, period. And that is where the art comes in, That blend of creativity and technical know how. Some say its a 70 30 split towards creativity, I would say its 90 10 to creativity, once you have some of the manual basics of exposure nailed.
Read Bryan Petersons "Understanding Exposure", coupled with his "Learning to see Creatively" (soon to be reviewed) and you have a good overview of the basics to master around exposure control.
Critical to all of this is exposure control - metering for the "correct exposure" being 18% gray, then adjusting that exposure to what it is you actually want to capture, and the gray scale (or zone) you want the various elements of your frame to be on. Understanding this and being able to do it has rally unlocked my enthusiasm and creative control - but again, its a never ending quest.
I love the challenge, the problem solving, the process, and even some of the results !
As a perfect extension to this topic and session, on the Thursday with Lucia we went through Tone. This was really cool and inspiring. When we think of tone, we talk in terms of Key, Contrast and Value. Our eyes can see many many tones, our cameras are limited to about 20 tones, with most of those tones being towards the back range. Hence we talk about tone intervals, equivalent to Exposure Value, and that the number of intervals is the number of tones - 1. Hence in a ten tone image, there would be a range of 9 tone intervals.
Tonal Contrast images come in High (light lights and dark darks), Broad (mix of tones evenly distributed) and Low(only light/only dark/only mid). It is definitely a skill to analyse images in terms of Tone, and to see in tones is even more challenging, but a fantastic way to view the world for creative image taking.
Ansel Adams is the clear master in this and has published many fantastic reference books and videos. This video about Ansel's Zone process is a cracker.
To finish up Lucia touché don Gestalt Theory. I bought a book ages ago that went it to this and I got to chapter 2 and lost it with it, but now I think I understand enough to be dangerous and will get back in to it. Its all about the psychology behind what makes a great image, and how our brains interpret information and shape and form. It's all about Symmetry, Simplicity, Proximity, Continuity, Common Fate, Closure, Regularity.
Another great session.

Workshop Experience : Photography Studies College Week #9

A busy week has been had preparing a number of assessable assignments for submission. We also hones some additional LR skills, along with a Thursday session on Abstraction.
A very busy time prepping our first major assessment submissions being : A Shutter Speed control series, our weekend location photo-essay (shown below - mine was around the National Gallery of Victoria in Melbourne), and our series interpreting the Cranbourne Botanical Gardens.
So we spent some more time in the digital lab to hone some additional LR and workflow skills to help us along. Certainly being led down the path strongly by Scott that "less dial manipulation is more" and thats why we all need to submit our images in RAW, such that he can track our manipulations and ensure that they are being kept to a minimum. I like this discipline even though its hard and exposes as lazy you become when you have such great software was LR and others..
Scott is not a firm "straight outta camera man " but he has taught me that composition and exposure can and should all be pretty much straight out of the camera tool, and upon import do the usual lens corrections, profile setting and some straightening if needed. Then you do some small adjustments around highlights and shadows depending upon the image you wanted to take in the first place. Finish off with some clarity adjustments and thats it. Done!
I have really enjoyed trying to follow this discipline and it has made me a better image taker already. And much more to go ....


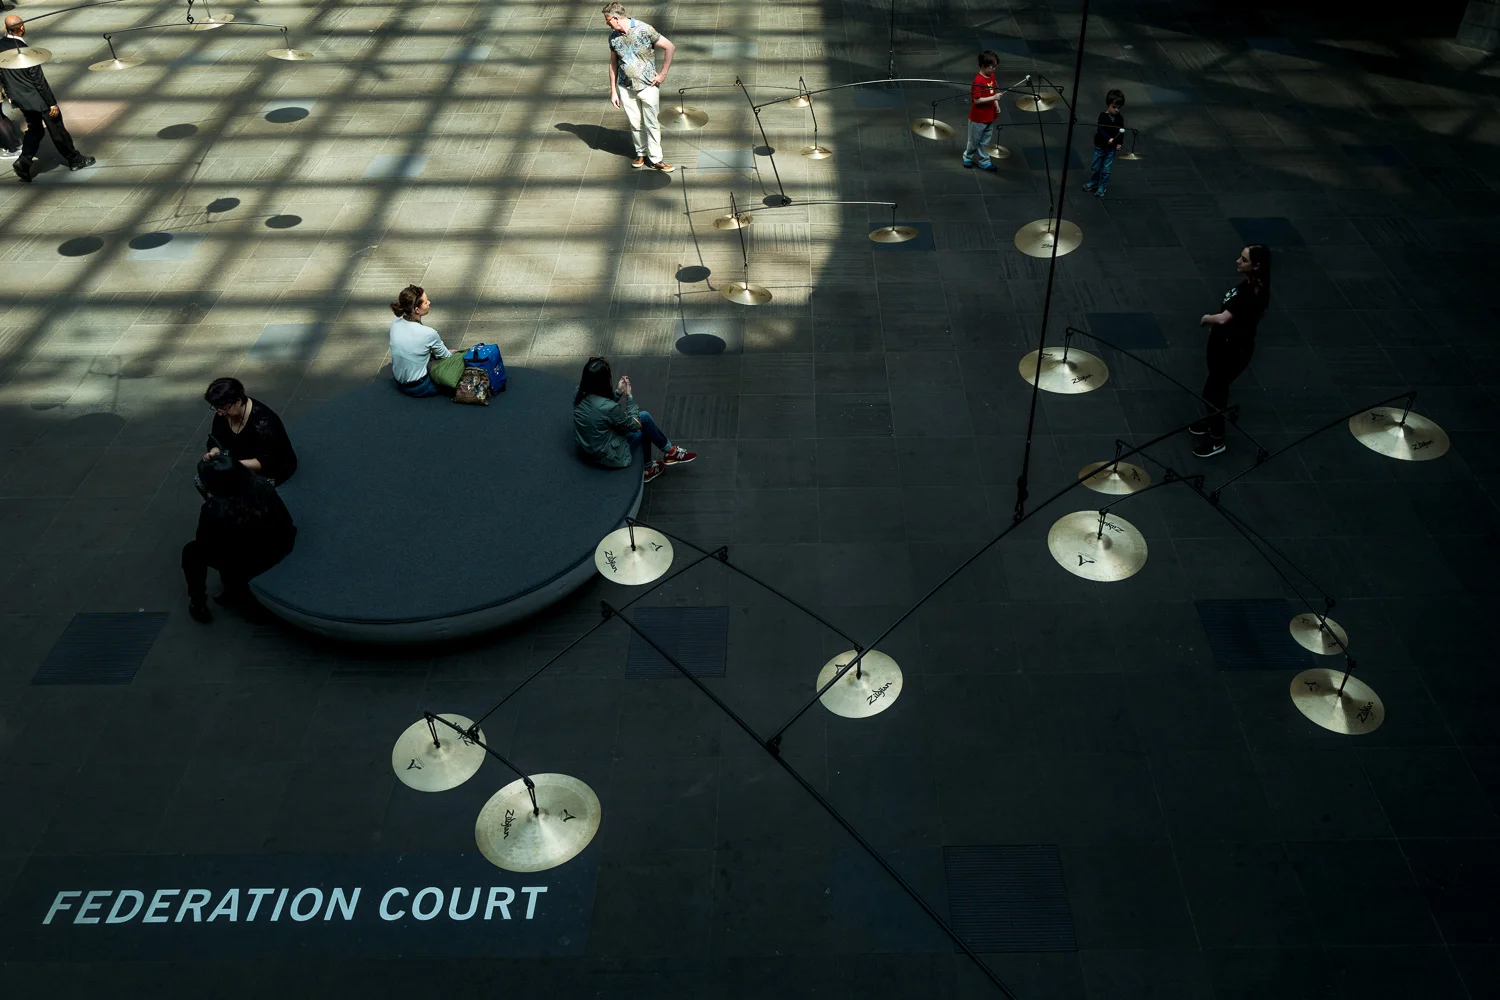


NGV Photoessay, Leica Q, various exposures
In our creative stream with Lucia on the Thursday we went about discussing Abstraction, the side of photography where nothing is as it seems. How you go about making the world seem obscure, and the normal look totally different to what it really is. Abstraction can be full or partial, and take various Shapes (2D/flat/circle/etc) and Forms (3D/Depth/Sphere/etc).
We looked in to how you use DOF to get abstraction, via blurring foreground, or the use of negative space to create a shape via tonal contrast. Perspective is also a massive tool to help abstract the normal, or use silhouette to get shape.
Removing reference points that make the brain connect to what the image is really showing is the key.
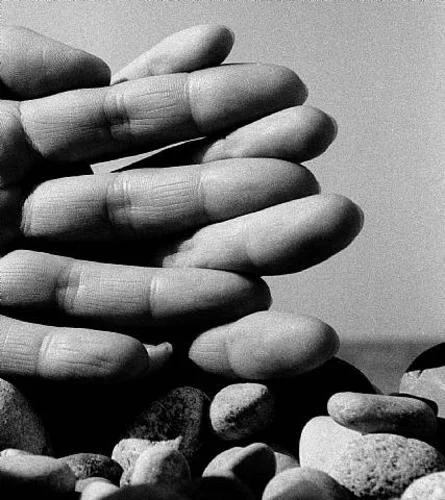
© Bill Brandt
Lucia finished up by summarising the key ways in which to obtain Abstraction, then sent us out on to the streets for a night abstraction shoot. A great session..
Abstraction techniques :
- High contrast shadow and tonal to make shapes
- remove points of reference
- change perspective
- play with light
- use back lighting
- use -Ve space creatively
- controlled framing


Workshop Experience : Photography Studies College Week #8

Week 8 brings an intense induction in to creative exposure, and handling all types of complex and simple exposure lighting conditions. On the creative and composition side, it was a deep dive in to Colour !
Wednesday night we got stuck in to discussing an understanding exposure and creative exposure a little better. Clearly this area is one of the most technical, problem solving and creative areas of photography - a great topic for a week night !
Understanding that the "exposure" is the amount of light that hits and gets recorded by your censor (film cameras not excluded here but will stick to digital examples for simplicity! although much translates to both forms of light capture of course), and that the three variables that effect this exposure are : ISO, Aperture, and Shutter speed.
The beauty of getting correct exposure is that you only really need to get the combination of three parameters "right"; and given that you can generally lock ISO away (ISO 100/200 for outside daylight sun; ISO600/800 or so for cloudy/late afternoon; ISO1600/3200 for inside) then really its "just" aperture and shutter - easy !
Things in photography are moving very quickly technically - but the above equation remains the same equation every camera tries to get right. As photographers Scott firmly let us know that it is we that need to take that role back from he camera, and hence master it. Simple things like getting the dial off P mode, manually setting aperture, shutter and ISO, and of course manually metering for the exposure that you want the camera to record for you due to your problem solving and creative decisions. Now thats the not easy parts right there for me !
So given the camera in your hands reads the amount of reflected light off any subject you point it at, it then returns you the ("a") combination of ISO, Aperture and Shutter to give a correct E.V (exposure value). When there are highlights and shadows in the frame, this makes the meter work even harder. Given human eyes can ascertain around 13 to 14 stops (E.V'S) for an image, Digital cameras are still catching up although the Nikon D series is getting arguably the closest. It really doesn't matter too much what range (dynamic range) your camera gives you as its all about the subject, composition and exposure that gives to a lasting image, so plenty to work with.
So we talked through contrasting light, direct light or front right, side light, and rear light, and the problems this imposes to capturing an image, and exposure ides to address it. This is where Scott's problem solving skills really came to the fore and how he made analysing certain lighting situations so clear and simple - much harder to do when he is not around ! It was a great session and really lifted my understanding and realisation of my gap areas. Much to work on practically out on the streets and surrounds, and really turn to a master slave type engagement with my kit !
For the Thursday session with Lucia we deep dived into the wonderful pool of Colour. Lucia started by stating that colour can be used to communicate Narrative (think green for Go or red for Stop); Mood (think red brown for warmth, cyan for cool) and Rhythms (think complimentary colours appearing throughout a frame).
We then went through the various colour spaces in use around photography - RYB/CYMK being the "on surface" colour wheels, and RGB being the "projected" (screen) colour type.
We then discussed the qualities of light, being Hue (Redness), Value (or Tone), and Saturation (Intensity).
We went on to talk at length around Colour Harmonies; Analogous Colours (those colours NEXT to each other on the wheel), Complimentary Colours Those colours opposite each other on the wheel), and Colour Triads (those colours connected via a triangle on the wheel).
Really interesting and challenging given I scored pretty poorly on the identifying hues test. Gulp. But as a male I am not alone sadly.
A fantastic and stimulating session, giving us yet another palette of compositional choices and problems to solve in order to add to our frame taking.
Special Edition Workshop Session
Whoo hoo ! We had an extra curricular activity this week in that for the weekend, we did two different location shoots. Scott bought along a helper, in Eamon Gallagher - great guy and really insightful and creative in his approach to photography.
We started the first morning with a discussion about the three main types of light - Front, Side and Backlit - and the Quality of light, being Soft, Harsh and Warm/Cool - and the exposure challenges and choices we can make in order to capture the subject the way in which we want to, and not in the way the camera wants to. Thats what we are all trying to achieve after all !
We were given two assignments for the weekend. Saturday was street and photo essay focussed and we were each given an area in Melbourne to go out and take some photos to create a photo essay. 10 to 12 images max. I was given the National Gallery of Victoria. This involved both indoor and outdoor shooting, lots of metal structure stuff, and plenty of tricky lighting scenarios. I found it fun and very challenging. Will post results when the essay comes together. Here is an image I have taken at the NGV before.

©LesWillPhoto
Sunday saw us going out to a really special place in Melbourne called the Australian Garden at the Cranbourne Botanical Gardens. An amazing creative landscape project that has won several global awards. We were to interpret the gardens and take 10 to 12 images to show our view of the gardens at a later date. It was a great experience and both Scott and Eamon really helped with the ways in which to meter for the ever changing light conditions, and the ways in which interesting frames could be produced. I don't know how well I went but I really learnt a great deal from them both. I also went down really early and caught some morning sun and took my drone to get some aerial perspectives.


Having assignments like these really hope focus the skills you have talked about and to practise them - always with mixed results - but thats the purpose. It was a great weekend, lots of walking and work, and I look forward to putting together some stories.

Workshop Experience : Photography Studies College Week #7

Week 7 saw us deep diving in to portraiture and practising on our ourselves, and also further investigating The Frame rule of composition. We also submitted some blur technique shots for feedback, as well as some shots exploring some of the elements of design.
This week in our Wednesday session we focussed on one of our end of course portfolio areas - Portraits. Scott our tutor took us through the two category areas of portraiture - Camera Aware and Camera Unaware. Being a professional photographer for one of Melbourne's largest media agencies, Scott is well placed to talk us through how you approach camera aware portraiture, how to get rapport with the model or subject at hand, and how to get people to portray as natural projection of themselves as possible for the frame you want to capture. As Scott said, "a portrait is merely a reflection of the photographers rapport with the subject at the end of the day".
Camera Aware tips from Scott :
- background image information is important and what you want to do with it (blur it out, incorporate it, back/middle/fore, etc. See above image by Mann.
- eliminate any distractions in the frame by positioning and angle of camera
- harmony in a portrait overrides other "rules" of frames such as thirds
- when working with a subject, before the shoot let people know of your ideas and plans if any, where you will be positioning them roughly, already have your general settings for your camera set up, etc
- during the shoot make as much conversation as you can, relax the subject, get to know some insights that you can leverage during the shoot, be confident, positive, provide feedback ongoing, etc
- body language determines personality so leverage your observations as much as you can during the shoot
Scott then went on to talk us through Photojournalism techniques and the genre of single image story telling. We also look din to creating photo essay, and the main building blocks being :
- Establishing/Intro shot
- Medium frame/People based shot
- Close Up/Detail frame
- Portrait/Environmental Portrait
- Interaction/Action frame
- Signature/Decisive moment frame
We also discussed the thoughts and views of Susan Sontag in her book where she states that photographers are always imparting their views through the images they take, an that plays out in photojournalism as well.
Scott finished up by saying all photography involves people, be it aware or otherwise, and that taking great people frames is the key to expressing yourself as a photographer. The challenge has been set !


Canon 6D with new nifty 50mm prime, ISO125, f/16, 1/60 panning
Next we reviewed and discussed each others attempts at panning images. Some really excellent results came from the class i thought. Mine are above. I struggled with this technique initially, by not having the shutter speed set slow enough. I switched to a 50mm lens and lowered down to 1/50 and 1/60 and got some half decent results on bikes and slow moving cars. But it is certainly more about practise than luck, so will stick at it on some differing moving objects to see what results can be achieved.
I unfortunately didn't make the Thursday session - my first miss ! Having read thru the online notes (a great aspect of this PSC course is that most notes are on line grouped under each week, so you can certainly review ahead of time, as well as catch up if you happen to miss a session. The internal website they run is also full of additional information, reference videos, and access to other great photography resources.) I see that Lucia took the class through more elements around The Frame, this time exploring Frame within Frame, the Rule of Thirds, and Golden Mean. More to come on these topics. Finally, we also had to submit a few images that explored the first session we had around the elements of design. Her are mine for Lines, Placement (symmetrical, edge of frame) and Weight. Until next time !


Line images via DJI Drone. Placement and Weight images with Leica Q, ISO800, f/7.1, 1/5000

Workshop Experience : Photography Studies College Week #6

We are in full swing now as the course gets in to Week 6. This week we covered subject awareness and panning techniques, as well as looking at the concept of The Frame and the principles and elements of design. Enjoy.
Week 6 and the course is in full swing now. Expectations are higher on the amount of shooting we should be doing outside of class and some of us are feeling under the pump in a few areas.
For the Wednesday night session with Scott we kicked off by discussing Subject Awareness and the differences between Interpretative and Representative images. Scott used one of my fellow students images of last week as a good example of interpretative - a factory reflection in a puddle from above, followed by a view of the factory from the puddle location perspective. Nice one!
“The whole point of taking pictures is so that you don’t have to explain things with words.”
We then looked in to a few differing photographers and their use of subject awareness. We looked at Rodchenko and his blending of drama and design through the use of off-axis (tilt) positioning.
We also looked in to Edward Weston and his amazing use of vegetables and shells, shadow and light to produce humanistic sensual forms. Hadn't come across Edward before this and found it really interesting blending of still life and portraiture.
Our image review session this week was simply any 5 images we wanted to submit. I thought I would try and follow the theme of our end result portfolio of 7 images each in the 4 categories of Landscape, Portrait, Still Life and Personal Expression. I ended up submitting the following 2 Landscapes, 2 People shots and a single Still Life attempt.


Everyone is really starting to shoot improved images although you still find yourself going back one step before progressing. Great process though in incremental steps..
We then discussed the panning technique and its value showing movement and pace to images. Our tutor Scott showed us a few he had taken recently and one was a cracking school of fish shot with the head fish crisp and the rest blurred din motion, shot at the local aquarium. Solid work.
And that has now become our assignment for this week - a few random panning shots as good as we can get.
For what it is worth, the general settings to get a good image are the following, but it takes a lot of adjustment and trail and error !
- 1/15 to 1/30 kids moving around (good luck)
- 1/30 to 1/60 for a push bike rider
- 1/60 to 1/125 for a car at slower speed
- and 1/80 to 1/250 for a fast moving car or motorbike etc
- use zone focussing for a rangefinder else single focus point for your quick digital camera
- a pretty wide lens makes it a lot easier - I am using the Q @ 28mm
- set ISO and aperture to get the right EV
- physically try and twist yourself towards where the object is coming from, such that as you pan and they go past you, you end up in a normal balanced stance with your camera
- use single or continuous shot (purists will say only use the single shot!)
- and plan to press the shutter release when the object is directly in front of you for maximum effect, the object being to try an get one aspect of the image sharp whilst the rest is blurred showing motion
- and practise as much as you can - as I need to do !
Then on to the Thursday night sessions where we are exploring the creative and composition areas of art and photography, and this week it was all about The Frame - this little rectangle we photographers try and represent the world we see through.
We talked about the Principles and Elements of Design, where the principles are the concepts behind what we are doing, and the elements are more the tools we use to express it. We focussed on a simplified set of principles, being B.U.R.P.E. :
Balance, the visual equilibrium of the frame
Unity, referring to the coherence of the whole; ties it all together
Rhythm, the timed movement through the space
Proportion, the relative size and scale of all the elements in the frame
Emphasis, the point of focus or interruption; where the viewer is drawn
We then as group discussed the elements of design, with particular focus on :
Placement, Lines, Weight and Cropping
For Placement, we looked at works from Francesca Woodman and Guy Bourdin and discussed the placements of subjects in the frame, be they symmetrical, edge of frame or extreme edge of frame.
For Lines, we discussed the difference of horizontal lines (restful, death, peaceful, etc) versus vertical lines (power, growth, etc). For Weight, we spoke of if the subject is at the bottom of the frame, it implies heavy and if at top, weightless. Alignment refers t the stability of the frame and then finally Cropping is all about whether the frame is Open (more things happening outside of the frame) or Closed (all information is contained within the Frame).
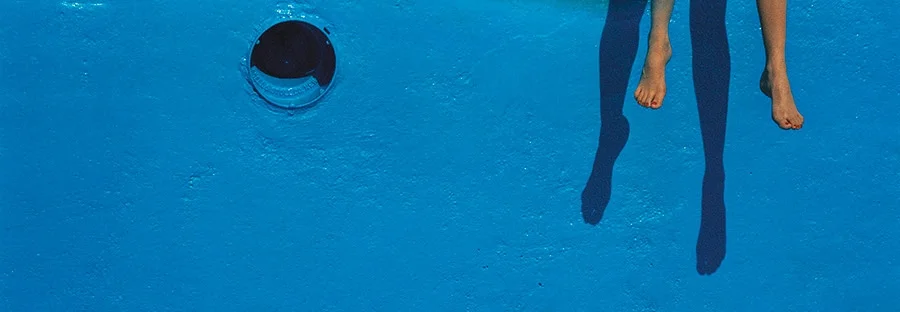
Image by Guy Bourdin
All really interesting and inspiring and gives deep insight in to why some images or a lot better than others!
Our assignment from Lucia for next week is to present in some images that explore these 4 elements of design.

Gear Review : Aerial photography using a drone

Combining flying a Drone and taking some frames is a great way to explore new landscape perspectives. Read my experience so far and share some of your own ideas.
Immediate disclaimer : I am up to my 3rd drone. My beloved 1st one I dumped into 10m of freezing cold water of Lake Eildon, Victoria Australia whilst chasing sunrise light whilst flying half asleep. After treading water and trawling the spot for over 3 hours later with friends using rakes and poles, we found it and saved the video and SD card (and due to a quirk in technology, the actual slash and submersion is wiped from the card )-: ), but of course the electronics and motors had other ideas than flying again. RIP. My 2nd was a victim of a different evil - G.A.S - so now I am on version 3 and its lasting well. I only declare all this to be clear that I am by no means all over this aerial pursuit, and that I am enjoying the learning path of how to use a drone to get some good perspectives and frames.
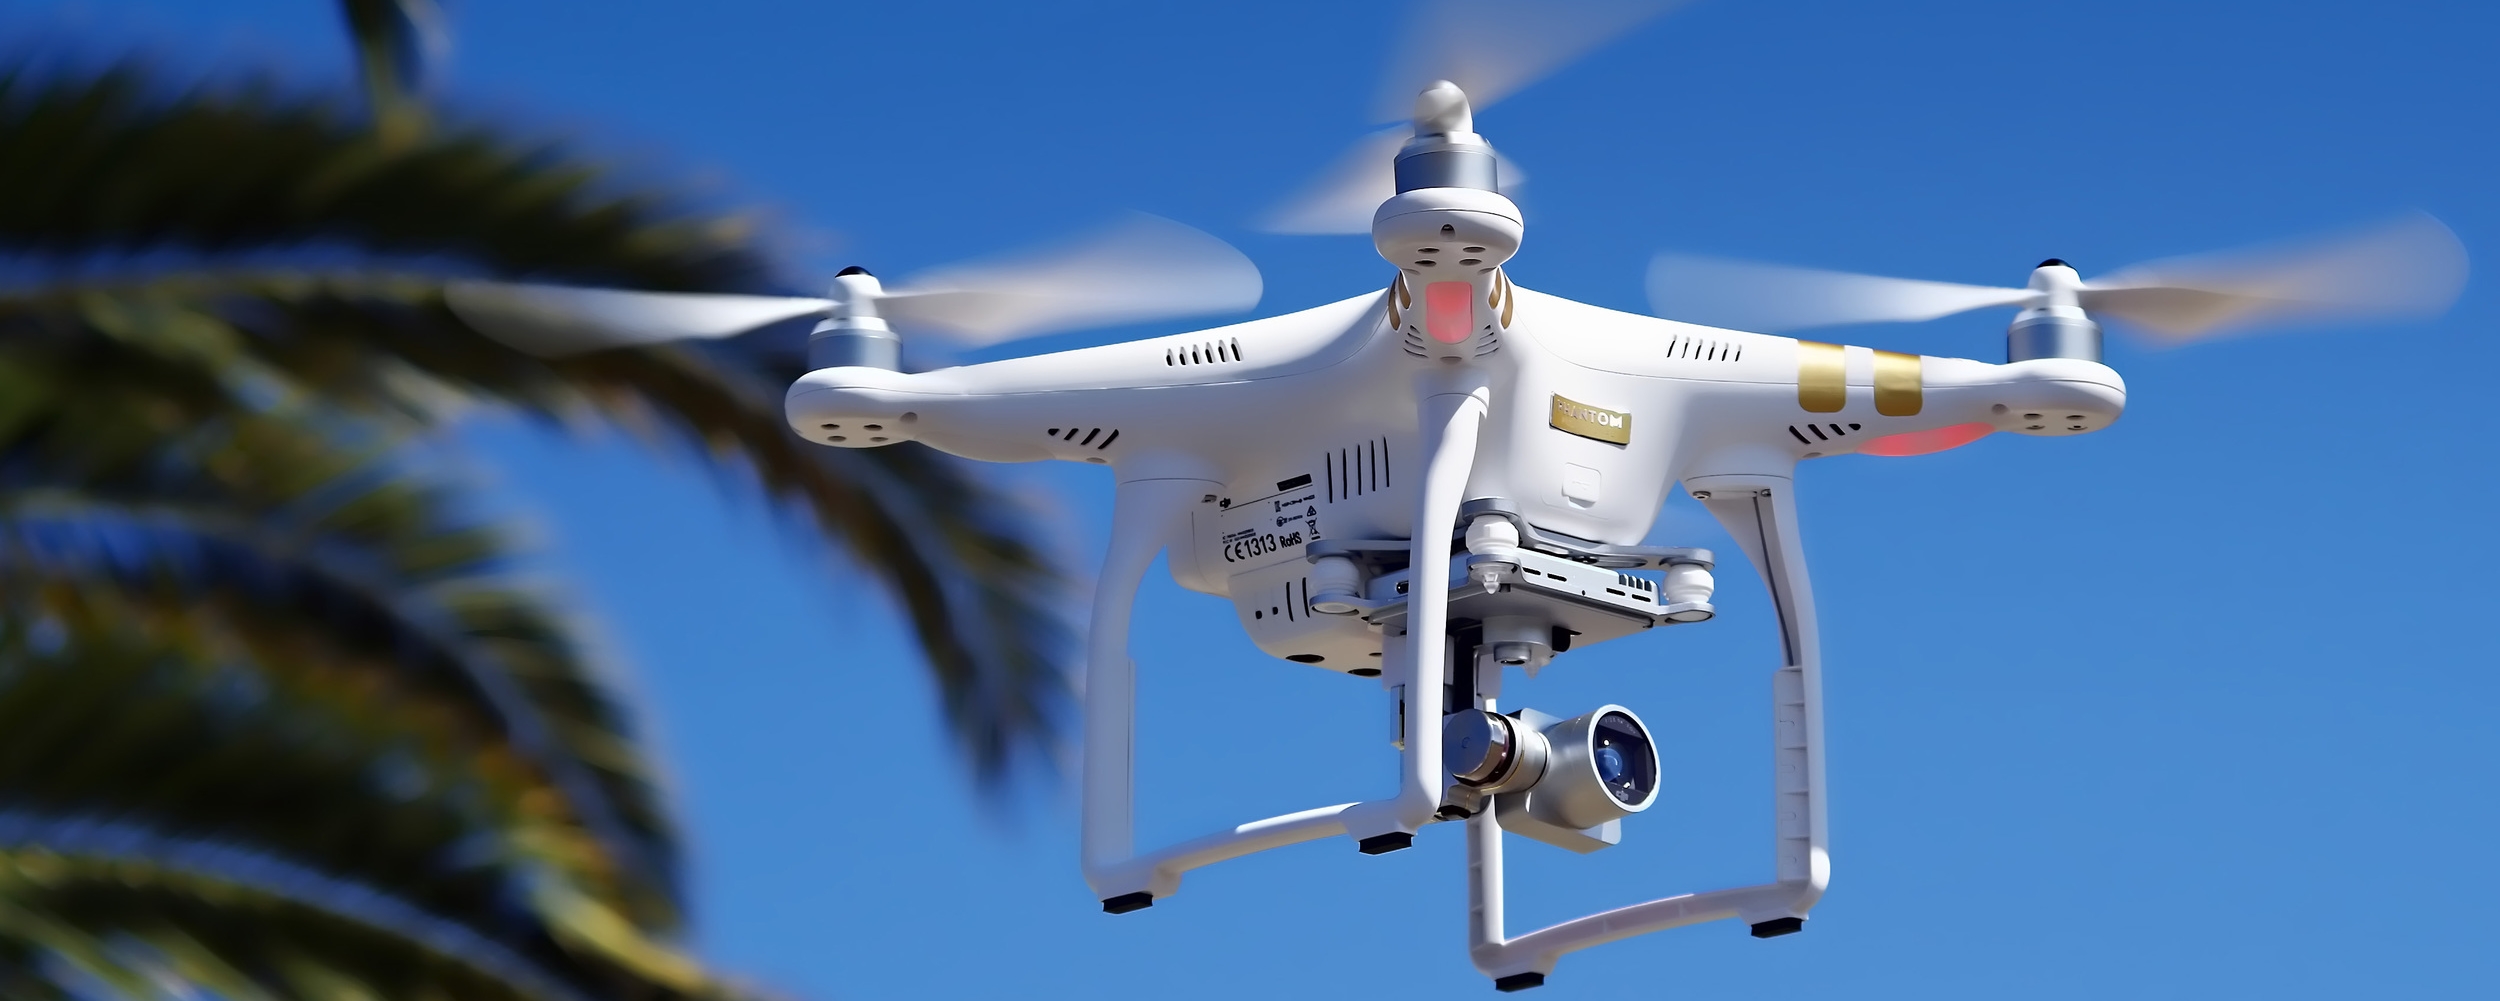
Image not the authors. Source unknown.
But let me outline some of the things I have learnt and what is inspiring me about this form of image making. First, its a great mix of gadgetry and photography - gadography, gadgetography ?! - so that should satisfy a couple of fixations all at once. Secondly, and probably most importantly, it does indeed open up a different perspective on urban and rural environments - the aerial perspective is rarely consumed for any length of time by any of us and is even more rarely captured so easily until now with the advent of prosumer drone capabilities.
I find landscape photography pretty boring. I admire the people that are good at it and tell a great story with landscape images - but I really struggle trying to pursue that for landscapes. Using an aerial perspective is changing that experience for me and that is what I am enjoying. Will see where it goes.
Now to some good old practical snippets that I have picked up and am using to explore this genre of photography.
1. Plenty of people are getting more and more in to this area so learn from them as a first step
A simple google will point that out. Its a cross over between the hardcore droners and the photographers, so I suggest you google both your drone type to first get insights in to the settings that matter for your drone as someone would have worked through that (check out links below for the Phantom 3 Professional as an example), and then google aerial photography to find people that interest you (again, example link below).
2. Timings and Locations
Still exploring this with regards to urban and rural. Here are some urban examples of one particular area I have done. Either way, golden hour timings are essential here due to the type of camera capabilities on the Phantom (other top end drones can carry a dedicated DSLR, but I would be way too nervous to strap so much cash on to the bottom of a flying plastic rat!) so grab an app for the phone of your choice, and get the up to date timings for when golden and blue hours are about you morning and night, and fly and shoot at these times. The nature of the fixed lens/fixed aperture in my case of the Phantom 3 works best in these lighting conditions I have summised.
For what it is worth, the Phantom 3 Professional camera uses a Sony EXMOR 1/2.3 inch sensor with 12.4 M effective pixels. It comes with a 20mm (35mm equiv) 94 degree FOV f/2.8 lens with focus at infinity, an ISO range of 100 to 1600, and shutter speeds from 8secs thru to 1/8000sec. It can do single shot and burst shooting of 3/5/7 frames, Auto Exposure Bracketing AEB : 3/5, and time lapse mode. The image size maxes out at 4000 x 3000. It shoots in either DNG, JPEG or both, and the camera pitch is controllable from -90 degrees thru to +30 degrees.
It wasn't so long ago that those specs were only found on mid level, rather beefy compacts. Gotta love technology cycles.
Back to the location side of things, I am just now working up the guts to fly over traffic/built up areas so will see if we all survive! (reckless droning is of course neither condoned nor practised). Australian law at this stage allows for public flying beyond 30m of public and private property. There are certain restricted zones like airports and such of course.
3. (Almost) Essential Kit
We love an accessory of course. Apart from the drone of your choice, for sheer ease of use and ability to focus on the frame, the DJI series are the go to guys in my mind for a solid drone with great functionality. Buy whatever suits your budget and enjoy. Use an iPad mini or alternative as your POV screen, and also invest in a decent screen holder arm from NZ Helmet Cams and sunprotector from Aerial Drone Accessories, again if you are using the Phantom. Both these products and stores come highly recommended for customer service and quality.

Image not Authors own. Phantom product shot source unknown.
I use 3 batteries and take them out with me for each flight as you do spend quite some time (or at least I do) hovering to find the right framing and adjusting the camera controls for the exposure you are after. Hovering (and the GPS interactions that that takes) sucks the juice pretty easily! (Again, check out the video mentioned below for good battery maintenance - saved me money !)
4. Keep at it and share your results.
Instagram type platforms are popping up now specifically for drone activity (Dronestagram, etc) so I recommend you get engaged and share results and learn from others that you like to follow.
I am along for the ride and I hope to share some more results soon on this site as my Aerial Project further develops.
Would love to hear any of your tips or suggested further reading to improve and explore.
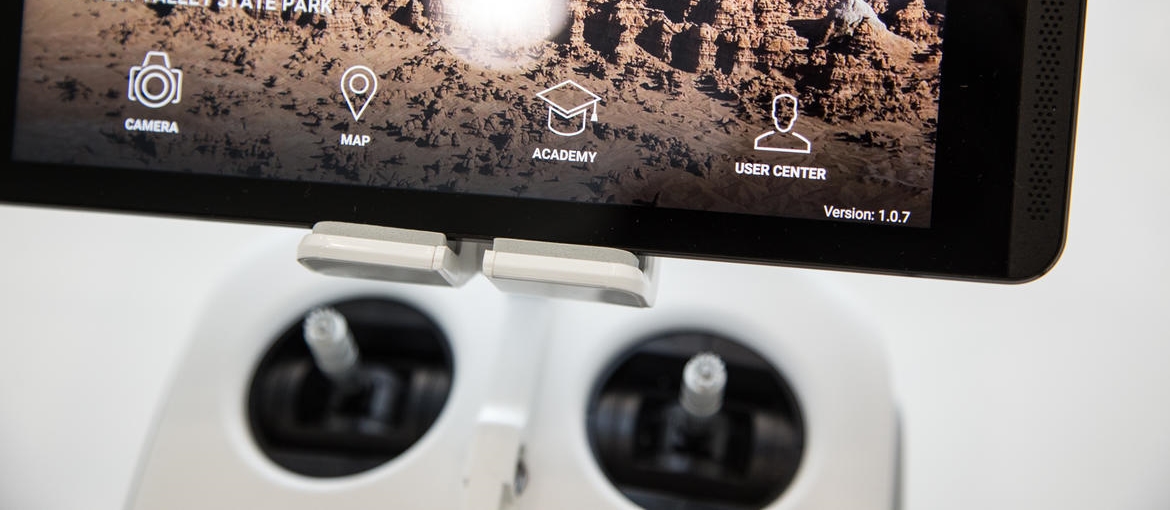
Not the authors image. Source unknown.
Some of the more than useful links I have used and continue to use are :
Best video I have seen for the DJI App and corresponding settings - this guy has gone in to deep detail in to the workings of the DJI App and the settings for the DJI Phantom 3. Dont follow all of them if you dont want to (eg the cinematic color video settings) but worth going through.
Great insights in to using a drone for photography by Randy Jay Braun - bit old but links to his ebooks which are up to date to end 2014 and worth the flick through in my view.
Drone nut Tom's Tech Time has great insights in to the technology and ways to save money and make the components work better.
Classic DJI dude that goes in to each and every aspect with a classic twang voiceover.