My workflow for capturing Milky Way Nightscape Panorama images
There is nothing quite like capturing the night sky in all its “hidden” glory. I say hidden because the images you produce aren’t quite able to be seen with the naked eye, yet there is no denying their magic and wonder even if you are a capture purist. Saying that though, lately I have visited two areas of the Southern Hemisphere - Great Barrier Island off the coast of Auckland, New Zealand, and Karijini National Park, in the middle of the Pilbara region of Western Australia and both these areas have a bortle night sky rating of 1 to 2 which is the darkest (and hence clearest at new moon) skies that our world can produce, and the milky way and galactic core are visible to the naked eye with amazing clarity, just not the colour range that a digital image can produce.
Camera technology and processing jiggery allow for milky way images to be produced like never before. And some of the newer smart phone camera sensors are even allowing for pretty decent results to be captured by just resting your phone on a ledge and setting off a 25sec exposure pointing towards the night sky.
I still prefer to venture out in to the night with a full frame DSLR and wide lens and set about trying to capture the highest quality night sky panoramas I can get - and its a never ending quest.
Here i detail my workflow and show some of the results that can be achieved.
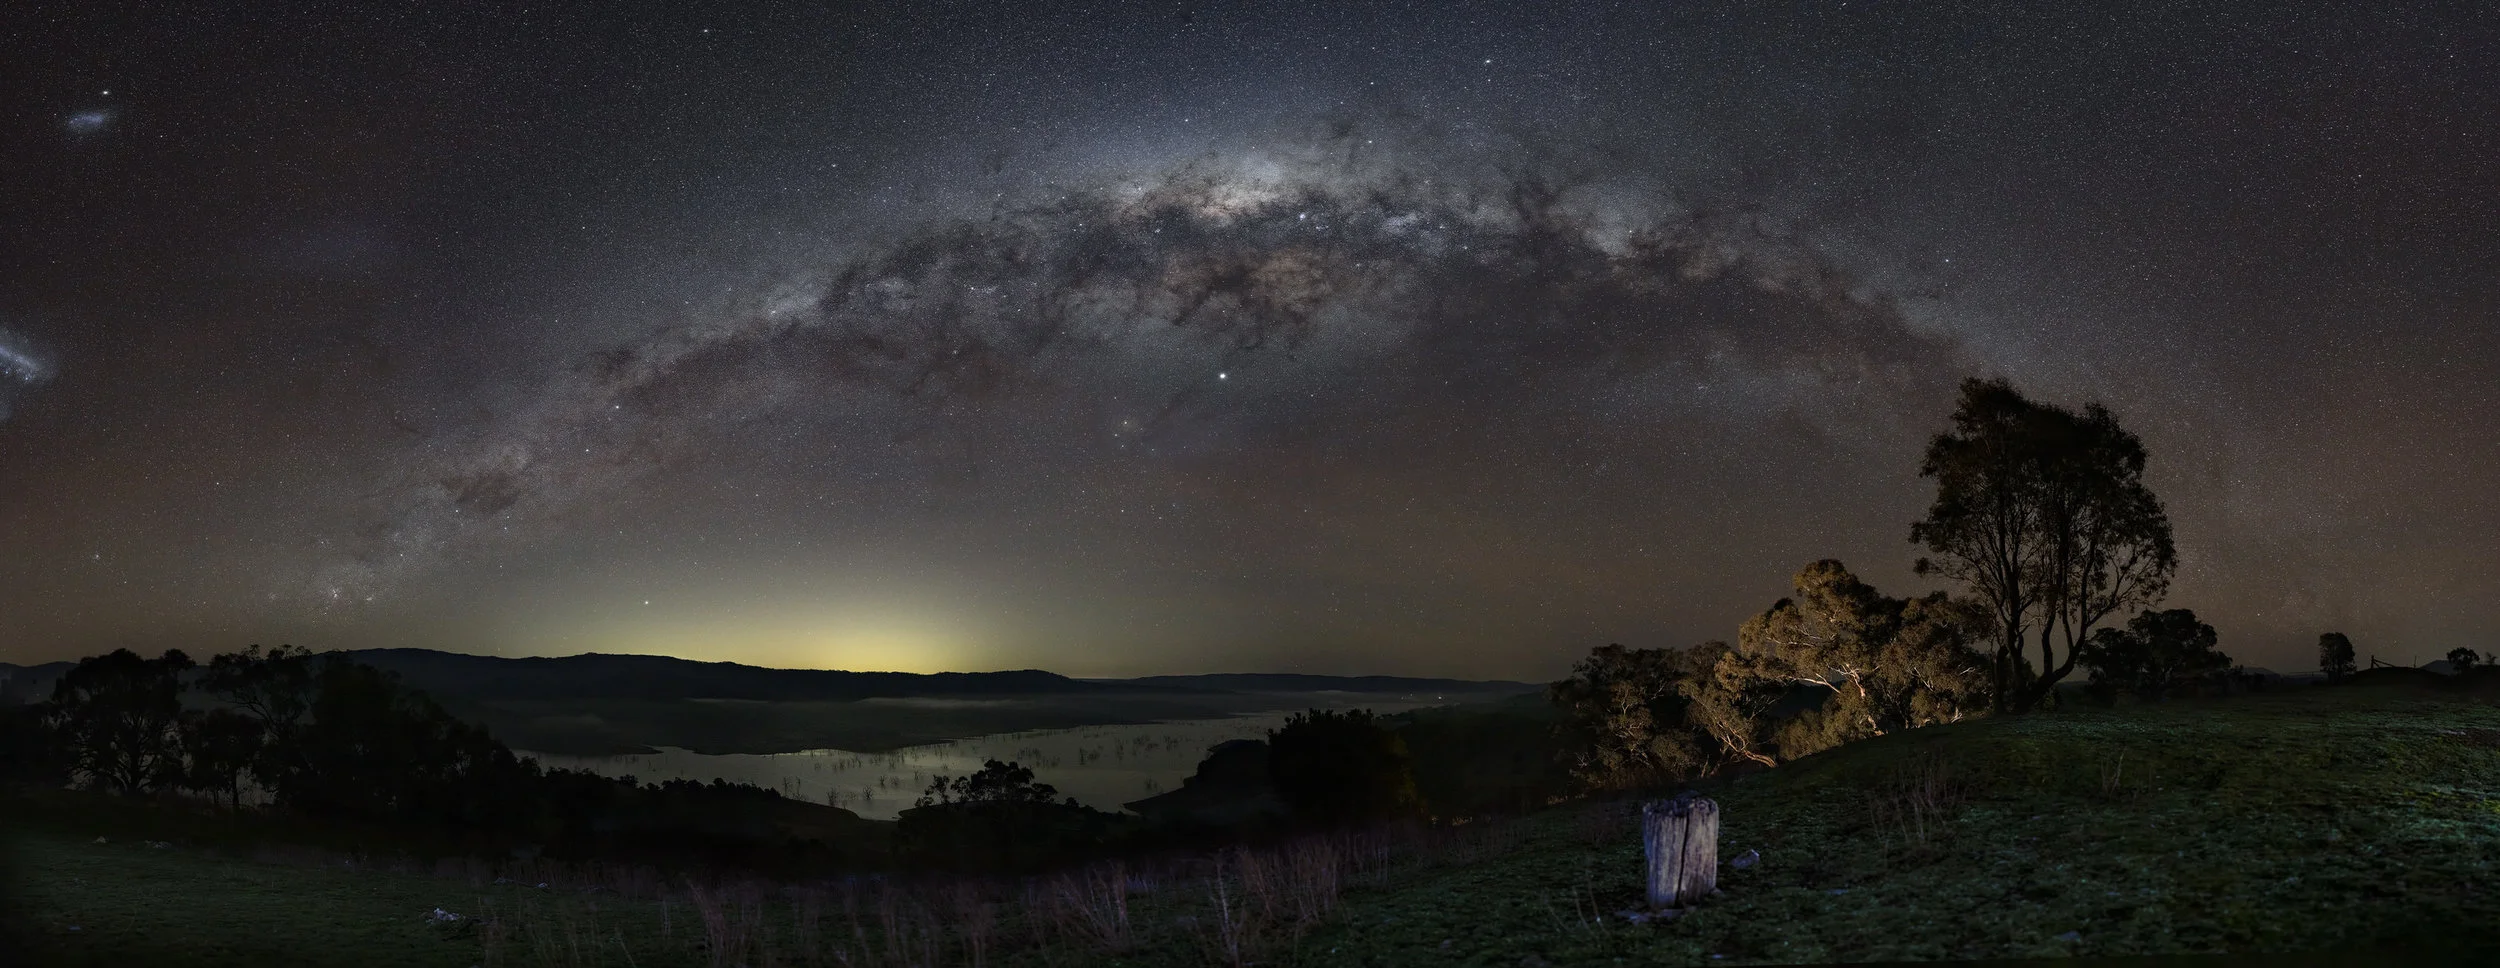
77 image pano using iPano, stitched with apg Gigapano s/w, ISO5000, f/2.8, 8secs, Canon 5DMkIV, Sigma Art 50mm
Before you venture out
In order to maximise your chances of getting a pretty good image, you have to do a little bit of planning, which doesn’t really fly with my style but I have learnt some discipline around this after many failed attempts of trying to wing it !
Always good to have a rough idea of where you want to take the images, and whether you will stay out all night or work out some accomodation or such. I am very lucky to have access to an awesome dark sky location about 3 hours from home, with a comfy friends farm to stay at and use as a base for my night adventures. Work something out because being cold and lonely out there with no comforts can be tough!
I use the awesome app Photopills to work out where the Milky Way will be in the sky, its path through the night, and where I need to be set up in order to capture the full arc panorama of the Milky Way (if that is what you are after). Lots of great instruction on how to use PhotoPills, it looks a little daunting on first entry, but once you find the bits that are useful and important for night sky captures, it’s a great tool to use.

Easy to follow tutorial here on the main aspects of the tool. I use the Planner - Galactic Center tab the most to get an overview visual of where I am setting up and the path of the Milky Way and also the important times that it is above the horizon etc. I then go to the AR mode when on site to exactly map where the Milky Way and Galactic Centre will be and this determines where I set up the camera etc.
I also use an awesome app called Scope Nights which tells me in advance with amazing accuracy the night sky conditions and cloud coverage. This app has been spot on for my locations and lets me plan ahead my trips and which nights are going to have the best visibility for milky way and star shots. Highly recommended to use.
The Gear
Less is always more as they say but I have found that with milky way nightscape panos, and to maximise your chances of getting some good images that can be easily stitched together and look good, you do need some extra gear to make it all work. I also like to set up my gear sometimes and leave it to run for extended periods of time, hence the battery options and the lens warmers.
For bare minimum pano shooting, you do need a full frame camera and as good a lens as you can afford. I use a Canon 5dMkIV with a Sigma Art Series 50mm prime lens. I use a 50mm lens as a find i can get great detail of the night sky and the milky way in particular fills the frame, but you do need to take lots of frames and have a good overlap (more on that later). Some use a 15mm or 24mm lens for panos but i find that they are too wide and don’t provide good stitching images due to aberrations etc.
With this camera and lens all I need is a decent tripod and off we go. Sturdy and stable is the only criteria for a tripod. I use a top end RRS ball head as well for this basic setup. With this gear you can go out and take pretty solid pano images of the night sky, manually adjusting as you go (see Taking Images section).
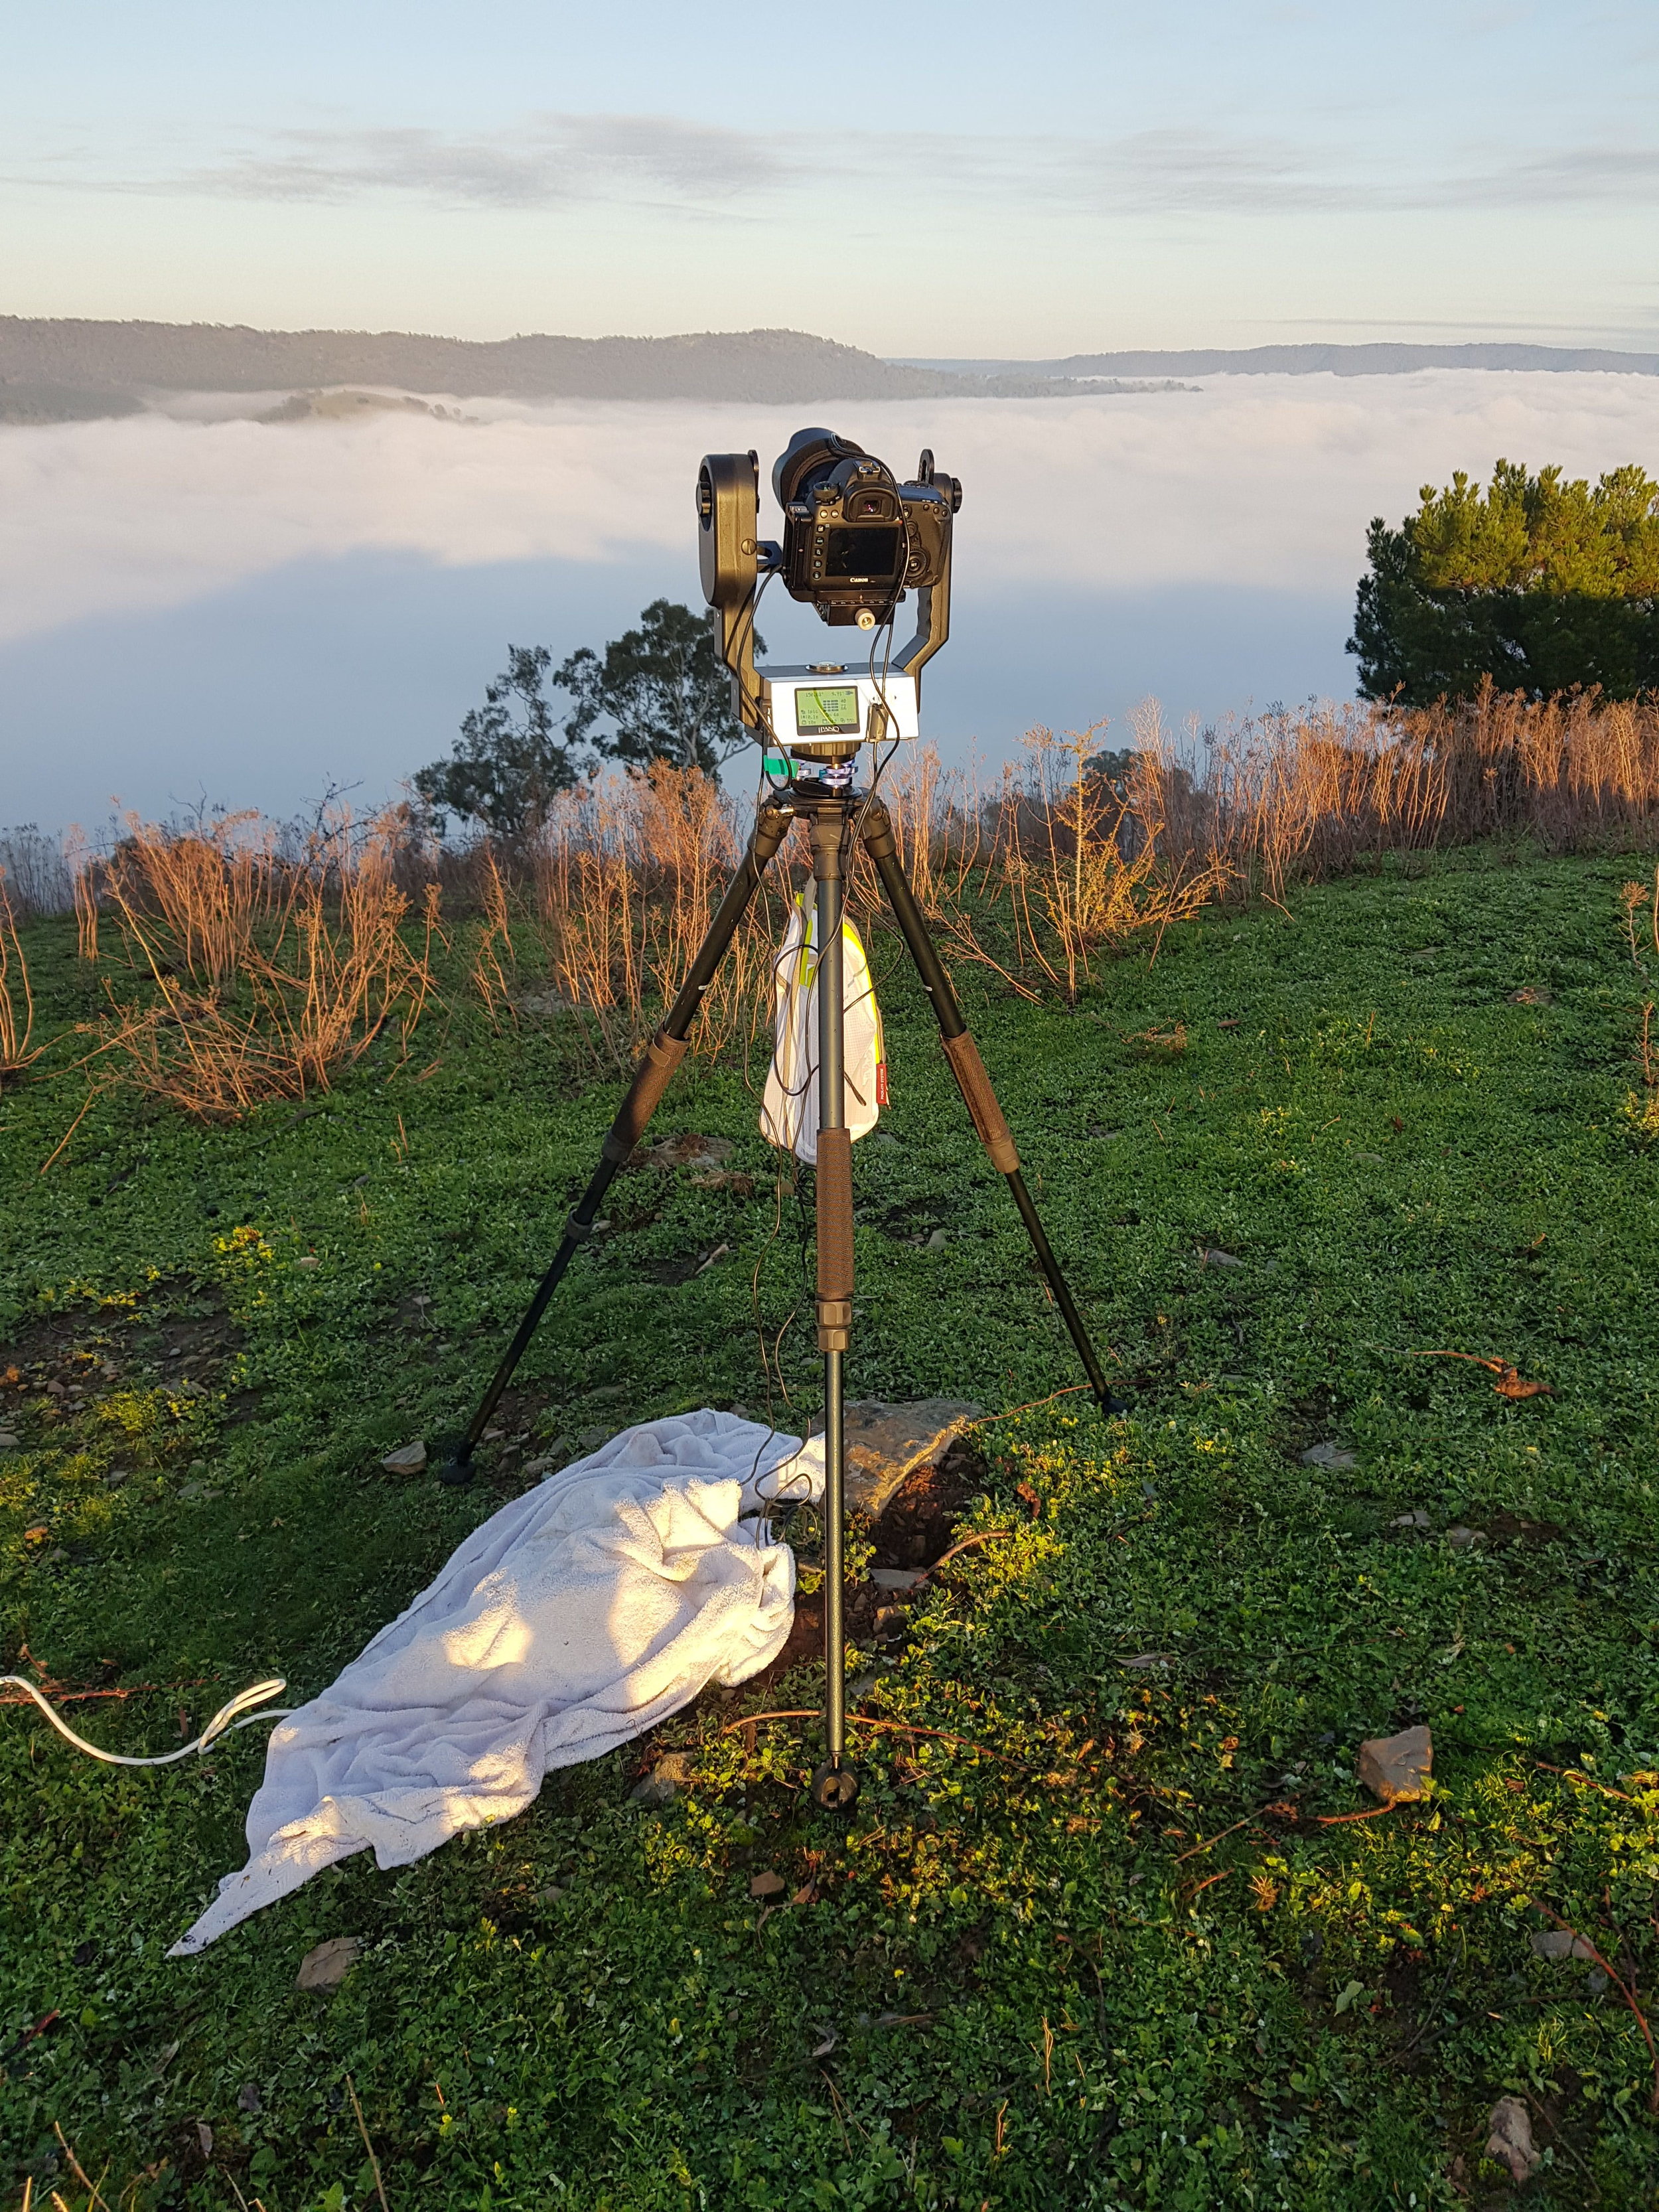
My “busy” setup - automated pano capture and lets me sleep whilst it works !
My “busy” setup lets me program what I want to capture, then set it in motion, and I can go off and do other things (like setup a timelapse rig somewhere else) or sleep ! Some purists may object to automating this but after standing in the middle of nowhere for many nights taking manual panos, I don’t mind automating sometimes either - its still hard work to get it right even if you aren’t pressing the shutter every time. I use this setup when I am also capturing timelapses at the same location. That needs more time and energy and by using the above setup, i can capture some great panos at the same time as i am capturing hopefully an engaging night sky timelapse.
The extra gear for this setup is the awesome iOptron iPano device. Thats what is sitting on top of the tripod (no ball head) and holding the camera. Its an automated panorama and timelapse device which I only use for panoramas. Its fully programmable and well built, user friendliness is a little to be desired with the menu structures and flow, but once you get the hang of it it does exactly what you tell it to do !
And i have to say their support is awesome, actually cutting me a new release of software to solve an issue I found!
How to use it and set it up is here . You basically set the camera settings you need for a night sky capture (i generally use with the 50mm lens ISO6400, f/2.8 and 6 sec shutter), connect the camera to the iPano as the iPano triggers the camera, then you set up the iPano - the starting point, the end point, the amount of overlap (I set that to 54%), the time between shots ( minimal), whether you want it to repeat over and over, etc. The battery life is great (good for over 600 image triggers) but I use an external battery to power this and a lens warmer for those winter nights and mornings. Kendrick Astro from Canada have the best warmers and controllers in the game in my opinion and great support.
Plenty of other gadgets you could collect but for now thats about it.
Lets set about using it all now !

Milky way over the Eco Retreat, Karijini National Park, Pilbara Western Australia. 88 image stitch, ISO8000, f1.8, 6 sec exposures with Sigma Art 50mm and Canon 5DMkIV with iOptron iPano for sequence. Stitched using apg Autopano software.
Taking images
So out in the field and on location after i have checked using the apps where the milky way will be and where the arc is best visible (generally between 15 and 55 degrees above horizon for the galactic core works well), you have worked out the end points of the arc, you are now ready to take some images, be it manually or automated.
Basic settings I use (but these change due to moon state, winter/summer, light pollution, etc) :
For a 50mm lens, ISO 6400 or 8000 up to 10,000, f/1.4 to f/2.8, 6 to 8 second shutter. These would be different if you are using a different lens of course, but try around these parameters. I find ISO at 6400 or even 8000 works fine for the newer cameras, and not much extra noise is introduced. My sigma is still sharpest around 2.8 but sometimes I drop down the shutter speed to 5 secs and stop down to f1.8 to try and capture really sharp stars. Atmospherics of the night really do play a role with sharpness so always check your focus.
make sure you use LiveView and set focus by finding the brightest star thru your screen, magnify to 10x, and manually dial in focus (it will generally NOT be the infinity marking on your lens), leave in manual and grab a piece of tape and stick it in place - the worst thing can happen is to move that focus ring ! Gaffa tape is your friend here. Once taped in place, you can then comfortably add the lens warmer without fear of movement.
If using just a tripod and ball head, take an image, then move your ball head on the same plane by 15 to 20 degrees, then shoot again, rinse repeat until you go all the way thru one pan, then adjust vertically, and do the same on way back. With this level of overlap (around 50%) i would normally take a 6 row by 12 image pano, being 72 images in total for the full pano.
Some people manually use a nodal ninja to ensure correct nodal length. A murky, deep and esoteric in nature discussion which I will not go in to here! Click on the link above to have a look in to it. I have used one before and they are a lot of work to set up (manually) I found for little benefit for astro but thats just my opinion. The iPano i use asks you to set up an initial nodal setting for the lens you are using and I find that both easy to use and for good outcome.
If automated pano is your way, set up the iPano to use Matrix pano mode, set you start and finish frames, which generally results in 77 to 84 images in total, set the iPano to repeat each matrix so you capture all thru the night, and set the timer for when you want it to start. As you are normally setting this rig up in day time, the camera is all set for night shooting, so your day panos will be blown out and overexposed by a lot, so the delay timer allows you to just take images when the milky way is out and in the position you want it to be. Power it by a battery if you need to and attach your lens warmer if you are expecting a low dew point temp. Of course always make sure you have formatted you SD card as lots of space is needed.
check all settings and if you are like me, you will hang around and watch the magic for a while until it either gets too cold or you fall over.

Milky Lake. 84 image pano, Sigma Art 50mm, ISO 5000, f/2.8, 8 secs
Post Processing
I must admit one of the great things about astro/milky way panos is that you don’t know what you have captured until you get back to your workstation and start to put the images together to reveal the magic. And of course how much you process the images is purely individual choice and I have found myself changing over time, but I was never one to over saturate/over dehaze/over sharpen anything !
There are so many how-to videos on the net on astro/milky way processing that i urge you to google Milky Way Lightroom edit or Milky Way Photoshop edit and see what you like. I am not going to add to that collection with another video, but I will outline the steps I take and links to the process if you are interested.
after importing into Lightroom, I immediately edit and remove chromatic aberration, and also profile correct. I also add about 0.5 exposure to all images which i find enables the stitch to work better
I then export all the images that make up the pano to apg Autopano Giga. I find this the best stitching software if you get your hands on it (GoPro bought the company a few years back and basically killed the product ! Bah humbug). Try Lightroom and Photoshop too as their stitching algorithms have improved, but they are nothing like Autopano in my opinion. Hugin and PtGui are the other favoured stitching software out there.
Once in Autopano, do an auto detect and 9 times out of 10 i use the Spherical perspective for the arc to appear natural. If it doesn’t, try the other methods as one will make it look great for sure. I don’t do anything else in Autopano with the stitch except render it back to the original folder location as a Large Photoshop Document, of which it really is. With the 5D and say a 77 image stitch, this file is upwards of 2.5 Gig, and its about 3m wide !
Once rendered, I open it in Photoshop and set the image size to a more manageable 50cm on the long side if I am only ever going to display the final image online or on a website. Save it as a normal PSD and the size is down to an easy 300 Meg or so.
then Back to Lightroom and I use LR to set the white balance of the image first up. To do this, push Saturation and Vibrance all the way to 100, freaks your image out but dont worry, zoom in on a dark only-stars part of your pano, and adjust the Temp slider until you get a nice mix of blue and green. Then zoom back out and adjust the Tint slider until you get a nice blend of green and purple, or whatever coloring you prefer.
Set the Saturation and Vibrance sliders back to the middle and you know you have got a good white balance when the milky way and sky look black and white. This is the starting point you want.
from here I then go back to PS and use Luminosity masks to grab the whites and then the blacks, and just push them up a little. Dont overplay this as this is where the unrealistic aspects of nightscapes can appear. A great video tutorial on this process is here - start at the 21 minute mark or so for the luminosity mask section
then I might do some localised edits using selection tools and feathering and adjust color, saturation, etc. Again, dont go too hard here and there are plenty of tutorials available on how to do this.
once all the edits are done, and i have removed star trails/planes/alien craft/etc that you don’t want from your image, I then apply a Pro Contrast filter using Nik Collections Color Efex Pro4. I find this just gets rid of any colour casting I may have really effectively and quickly. Be selective with your use of the adjustments on the top right side and choose something that works for the image at hand.
then i do a final noise reduction process using Dave Morrows techniques. Love this guys work and he is super helpful. Check out his tutorial here.
Last and certainly not least is a final sharpen. Go easy on this and i tend to sharpen the lighter parts of the milky way, core, and the foreground only. In Photoshop, create a stamp visible layer (shift option command N, shift option command E), then desaturate (shift command U for mac), then drop down to vivid light in the drop down panel, then go over to filter and other and high pass, set a value of 0.6 to 0.9 and hit ok. Then invert a mask (shift and command and vector mask) and then with a soft brush, opacity and fill 100% delicately spot over the brighter parts of the milky way, stars, core, and foreground
Done !
I hope all of this helps you in your quest for the never-achieved-but-great-fun-trying perfect milky way nightscape image !

©leswillphoto2019. Milky Way over Joffres Gorge, Karijini National Park. 88 image stitch using apg Autopano software, Canon 5DMkIV with Sigma Art 50mm, ISO6400, F1.8, 8 second exposures. Used LLL* on foreground gorge.
LLL, or Low Level Lighting, is a whole other ball game, and someone who I widely respect and admire Wayne Pinkston is the co-originator of such a discipline. Check out their extensive resource here .